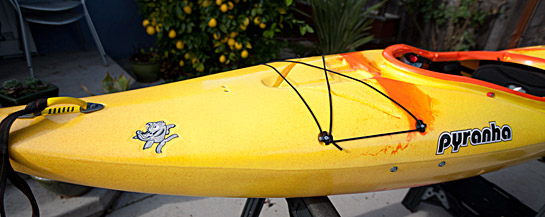
Adding Perimeter Lines to the Pyranha Fusion
Here in the San Francsico Bay Area, the Pyranha Fusion is an increasingly popular rock gardening kayak: It’s about 10′ long, intended for self-supported river running, but it has a skeg for tracking well in flat water. After trying one on the Mendocino coast (which you can see in an earlier blog post and video), its responsiveness and stability was awe-inspiring in ocean whitewater conditions. I knew I had to have one!
But, being a sea kayaker, I was struck by its total lack of perimeter lines. I’ve never seen a river kayak with perimeter lines, but nearly every serious sea kayak has them. When you need or practice rescues and recoveries as much as I do, they are absolutely essential for maintaining contact with your boat should you wet exit…or for someone else trying to recover your boat for you. In fact, a recent pool session revealed that a friend almost couldn’t even lift if after a capsize to do a T-rescue, as the front grab loop was the only place to get purchase.
So, I decided to add some perimeter lines to my brand new boat!
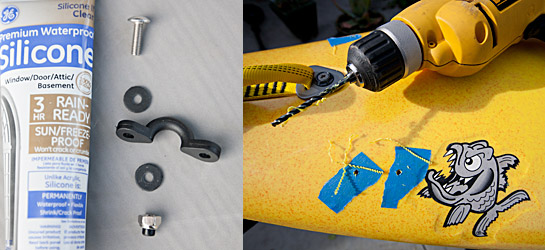
It was easy to do, but time consuming. I made sure to measure it all out, tape down the cleats where I wanted them, test rope runs, and generally take my time. I was about to drill holes in my own freaking boat, so there was no way I was going to rush it.
I purchased a standard kayak rigging kit from Harmony, as well as some reflective cordage. The plastic on the Fusion is soft, but I wasn’t about to chance the drill walking (slipping on the surface before it bites into the material, misplacing the hole), so I made sure to put painter’s tape down before drilling. Worked like a charm. Besides, pencil doesn’t take to the plastic for marking hole placements, anyway.
The instructions suggested a smaller drill hole than the screws provided, which worked like a charm for a tight fit through the thin, flexible plastic of the Fusion. The kit didn’t come with any way to really waterproof the holes for the deck hardware, so I got some 3/8″ rubber washers from the hardware store to back the nuts under the deck, and some silicone sealant for under the deck eyelets themselves, which would also coat the screws as they went through the deck.
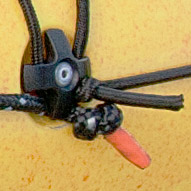
The biggest problem was dealing with the existing deck hardware. P&H sea kayaks, Pyranha’s sister company, use the same hardware with metric hex screws for easy loosening or removal. The Fusion uses rivets, making it impossible to loosen the fittings! This required cutting the perimeter lines extra long, searing the ends and shaping them line flat wedges, and using a screwdriver to wedge the cord through almost one fiber at a time, until I could pull it through with a pair of pliers.
[Tip: Working with synthetic cordage always requires searing the ends with flame. My significant other discovered that using a nomex and kevlar glove like the Ove Glove is a great way to use your fingers to shape the seared ends without getting burned. Keep one with your cordage supplies and lighter/butane torch: It makes things go much faster!]
I decided to also add a line of shock cord at the bow, threaded through old corks, to better secure any spare paddles I might bring. Having broken paddles before, I’ll never mix it up in tough conditions without some sort of spare! This made me much more confident that big waves wouldn’t rip my spare off my front deck.
Silcone sealant usually needs at least 3-4 hours to cure, but I did this at least a week prior to needing the boat, just to make sure. The final perimeter lines were taught enough to meet my aesthetic criteria, but loose enough to make grasping a snap even while wearing a 3mm neoprene mitt. Overly tight perimeter lines can be just as bad as having none at all in cold weather and rough seas, where your hands might be in thick gloves and your hand-eye coordination is compromised!
While I’ve written about all of the safety issues that make perimeter lines desireable, they have another purpose: Making it easy to pull up alongside a companion that has tasty on-the-water snacks! After a few hours, my snack-marauding playboat was ready to rock, and I was ready for a well-earned cocktail.


Snackman-Great job. Now you have to buy a 4 pc spare paddle so it will stow neatly on the deck. That “hanging over the bow” is so not Nathan Style.
@Chris: I do indeed have a four-piece, but I can’t imagine putting enough of it together underwater to roll with effectively…unless you’re proposing a 1/4-paddle pseudo-norsaq hand roll? :-p