Post-Expedition Musings II: Packing

This is a packing test for my 2-week Vancouver Island trip.
I wound up using at least five more dry bags than shown here!
This is the second in a series of articles detailing what I learned on a 2-week kayak journey on the West Coast of Vancouver Island, a trip with four others that ranged from the South Brooks Peninsula to the northern tip of Nootka Island.
Of course, if you’re camping out of a kayak, you need to find a way to pack all your stuff in your boat. But what many inexperienced kayak campers don’t realize is that you need to re-pack your boat every. Single. Day. Doing this every day for two weeks solid makes you pretty self-critical of your packing strategy!
Having just gone through this myself, I thought I’d offer my own take on some of the harrowed, classic kayaking strategies and some new discoveries I made on my own.
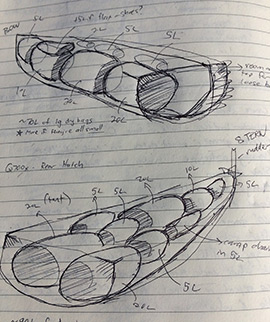
Visually recording the results of test packing was very helpful in devising a packing strategy.
Visualizing Success
If you’re a backpacker used to having only 50 to 80 cubic liters of space to deal with, not to mention the weight, kayak camping is a godsend. Depending on your boat, you may have two to three times that amount of space, with less concern about weight. But dry bags and the air trapped inside of them sure can make your kayak feel a lot smaller than it looks.
I found it helpful to not only write down what fit, but to make drawings of various packing arrangements, and to jot down which configuration packed most effectively. I tend to make perspective sketches so that I can show both side-to-side as well as top-to-bottom arrangements.
I keep all of my drawings in my kayaking journal so that I can refer to them later, when considering packing strategies for trips of different types. You can see in the photo to the right that I sketched out exactly where everything fit in my front and rear hatches, along with the size of each drybag that I used. I found that this helped a ton in assessing fit, and mulling over alternate packing methods.
As you can imagine, how I fit everything during test packing at home bore little resemblance to how I was packing every day near the end of my trip. And that’s OK. What mattered most to me in the planning stage was ensuring that everything just fit!
Drybags I: Say No To See-Through
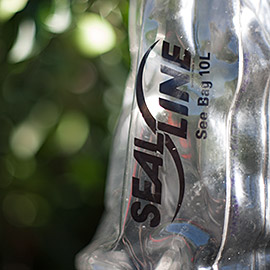
On day trips, see-through drybags made of clear vinyl are fantastic. Super convenient.
However, when you try to seriously pack with them, with tons of gear and limited space, the outer surface is almost adhesive. It’s hard to slip any other bag past it, and literally impossible to have two bags made of that material slide past each other. They stick like glue.
It hurt me right in the wallet to buy replacements for the clear bags I already owned, but it was the right decision and avoided a lot of headaches. Avoid these plastic, sticky-surface bags like the plague!
Drybags II: The Shape of Things
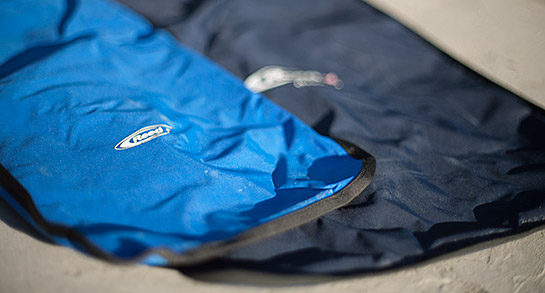
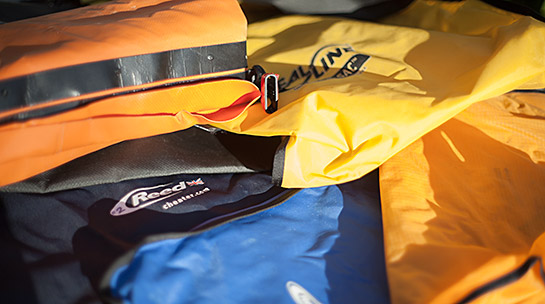
Drybags are usually round in cross-section, which is too bad. Oval cross-section drybags would be a great addition to one’s packing strategy. Evacuating air out of bags when closing them is good and a standard practice, but try flattening them out as well. A bag shaped like a flattened oval opens up a lot more packing options than if it’s nearly round. Takes more time to burp and seal them this way, but the easy of packing tradeoff is worth it. Reed Chillcheater makes flat, envelope-like drybags that were just amazing for things like books, charts, and camp footwear. Here’s a tip: Those Chillcheater bags are easily reversed, so I put my wet paddling clothes in a reversed drybag, and then turned it back right-side out to put my camp clothes in. Snazzy!
Tapered dry bags are great for traditional boats with a lot of rocker and pointy bows and sterns. But they are handy even a boat with a nearly plumb bow (that is, not much upsweep, like a surf ski) and no skeg box, since the bow and stern still taper in width. Another tip: Attach a length of cord to bags you put at the extreme ends of your boat, or at least have the buckle or something hookable facing towards the cockpit. All the shoving involved in packing a kayak will probably render them far out of arm’s reach when you arrive in camp, especially in expedition boats – those beasts are long!
While round in cross-section, dry duffle bags are brilliant for immediate access to items that are a real bear to remove or reach through a small round tube. I wound up adoring my small Watershed-brand dry duffle bag for my photo equipment: Tough, convenient, and easy access via a wide-mouth, lengthwise opening.
Drybags III: Small is Beautiful
One of the most common pieces of expedition advice is that many small dry bags are easier to pack than fewer large drybags. I definitely found that to be true. Only my tent must go in a 20L bag, and I don’t pack anything in dry bags larger than that. In fact, I make a point to ensure that even if I use 20L bags, I try to never fill them that much more than 50% to 75% full. I split my clothing into standard camp clothes, spare paddling clothes, and outerwear, and each fits in a 10L bag.
However, the more small bags you use, the more carrying a bajillion little sacks starts to suck. So, pack at least one carrier bag per hatch, preferably more. My favorite, and the kayaker’s standard all over the world, is the sub-one-dollar FRAKTA Ikea bag (a short thread on who started this can be found on the West Coast Paddler forum). Even if you can’t carry more than two at once, having tote bags that can accommodate every one of your dry bags keeps them free of sand or other gunk.
I even took a Pelican case on this trip for electronic equipment, but one of the smaller ones. Even though it was a square box in a curved hull, its size meant that it could be packed pretty much anywhere. I own at least eight Pelican cases from large to teensy (I shoot video, photos, and audio) and I utterly trust them with any contents of any value.
And don’t overlook the compression possibilities of dry bags with purge valves. Products like the Hyalite Pneumo dry bag can save a lot of volume if you purge the air out before packing them.
Drybags IV: Inside or Outside the Tent?
Salt can make fabrics hydrophilic, more readily absorbent of moisture That’s not something you want to do to your tent. Some folks never, ever bring a dry bag into their tent for this very reason. Others really don’t worry about it. We split the middle, as best as one can: We bought a tent (just discontinued in the last few months) that has two huge vestibules, and all the dry bags that held our clothes and personal effects got shoved in the vestibules. This way if the fabric became hydrophilic, it would only affect the rain fly (which doesn’t contact the tent body), and the fabric doors (which are covered by the rain fly), instead of the interior walls or the floor…yet we had footprints for our vestibules to also keep most of the sand off the drybags themselves. Our drybags really didn’t get wet from much other than rain and condensation, so either way, this was not an issue for us. Buying an oversized tent (3-person) for kayak camping (2 people) worked very, very well.
Sacks of Stuff!
Another way to keep your dry bags outside of your tent is to subdivide your items into silnylon stuff sacks, and stuff those into the dry bags. These ubiquitous items can be purchased in almost any camping supply shop or online, and they’re very easy to make yourself. This isn’t about double-bagging to prevent water intrusion, but for easier organization, faster packing, and a way to get your gear inside your tent without bringing your dry bag inside.They are handy for a few reasons: First, they’re so light that even a bunch of them don’t add much weight. Second, they’re water resistant. Third, they’re slippery and slide into drybags well. Fourth, it lets you dump something dry into your tent at the end of the day instead of needing to bring in a damp or wet dry bag. Finally, it helps ensure that none of your individual things fall into the sand or get rained on once you pull them out of the drybag. Since they’re not airtight, it’s easy to purge any air out of them. Doing this with any bag that’s more waterproof, like Ziplocs, will making re-packing frustrating and extremely time consuming.
Ultralight is Right

At the beginning of this article I said how much more space one one has in a kayak as opposed to a backpack. But between the fact that you need camp clothes, paddling clothes, dry bags, and safety gear, that space runs out faster than you’d think. This is where having some ultralight backpacking experience and equipment comes in handy.
Ultralight backpacking equipment is that it is, by design, lower in volume that its standard-weight counterparts. (One exception is that sometimes lighter does mean bigger, like foam sleeping pads.) Examples of gear that’s not just light weight but low volume includes ultra-compressible down coats and bags (if you’re an ultralight backpacking guru, you know how to keep your gear dry), 7- to 15-denier “windshirts” like those from Japanese outdoor retailer MontBell (highly recommended), extra-compact Jetboil Sol Ti, and the ultra-teensy Sawyer Squeeze filtering system and collapsible water bottles.
Another ultralight principle is that of repackaging: Take only what you need, from how much toothpaste and sunscreen you’ll need to only enough duct tape you’ll need for a few repairs as opposed to a whole roll. If you apply this from everything from your oils and spices to your personal hygenie kit, you’ll see quite a weight and space savings.
Now, back to the topic of weight: Like it or not, one is never supposed to lift a fully loaded, unsupported kayak without straps or similar. Most cockpit coamings are attached with Bondo or other adhesives, so lifting from the coaming could spell disaster. So the best practice is to get your kayak to the water’s edge and then bring all your gear to the boat. You are bound to make a minimum of three to four trips up and down the beach when you load, and the same number when you unload. Honestly, I got more tired (and more exercise) toting gear between the boats and campsites than I did paddling. Weight makes a huge difference at these times of day, often when you’re at your weariest after a day of paddling.
Pack by Priority and Frequency of Need
The last thing you’ll need in camp should be the first thing that’s packed in your boat. Anything that’s near a hatch on your boat should be one of the first things you’ll need when you take out, whether it’s at camp, a lunch break, or a rest stop. This can sometimes conflict with other goals of space usage and dry bag size, but it’s worth trying to adhere to this rule of thumb to save time and effort.
A Word on Color Coding and Labeling
Some of the folks we went with had written what goes in what drybag with permanent marker. I couldn’t imagine doing this, possibly out of my own lack of experience, but also in case you devise a better organizational plan later! I know that some also color-code their drybags: Blue for clothing, green for kitchen, yellow for camp gear, and so forth. Again, so many things take so many shapes – and so many trip styles are so different from one another – that I can’t imagine having so much pre-planning that this would be an inviolable rule/system.
First, I wrote numbers on dry bags that were the same color and size, to avoid confusion. When traveling with a group, you never know when you might need to verbally direct someone to one of your own bags to retrieve something important, especially if you become injured (“The first aid kit is in the small green drybag labeled #2.”).
Then I just labeled my drybags with colored paper tape to define what their actual contents were. The tape was color-coded for clothing (green), kitchen (yellow), electronics (red), and so forth. I then wrote what was in each bag on the tape in permanent marker. I found this sufficient for most purposes, and gives me the flexibility to use a smaller bag if, for example, my kitchen set up is bigger or more smaller someday. Electrical tape is more robust, though, as paper tape can get wet and rip off. Even if you’re not an anal person by nature, being this organized will save you much frustration and time once your trip is underway.
And, finally: Black drybags are sexy. But the interior of my boat’s hatches are black, and I lost a bag in my own boat for 5 months after my expedition was over, as it was shoved so far in the stern it wasn’t noticeable. It took a flashlight and a long hook to find and retrieve it! However, on sunny days in the Pacific Northwest, sometimes it’s nice to have camp clothes that have had a little solar heating. 🙂
Excellent article, Nathan! And just in time for Tamales 🙂